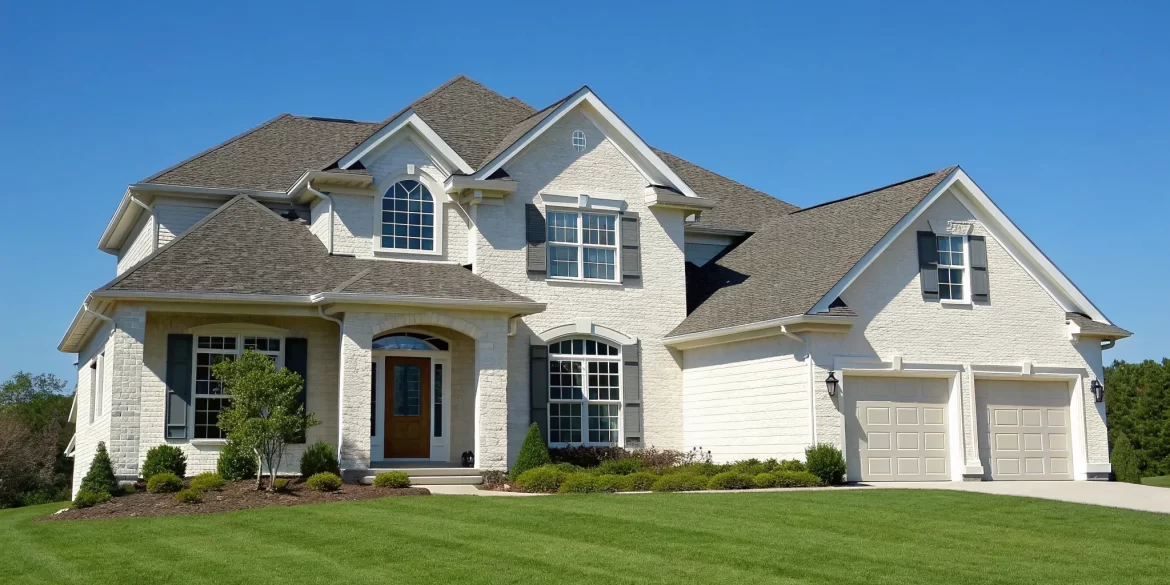
It’s a common belief that a home has to be in the direct path of a major fire to be at risk, but that’s not usually how it happens. The real threat often comes from tiny, wind-blown embers that can travel a mile or more and find something easy to ignite. This is where home hardening becomes so critical. It’s the process of making your home more resistant to these embers by focusing on potential weak spots like vents, gutters, and roofing materials. This guide shifts the focus from the distant threat to the immediate surroundings of your home, showing you how a series of strategic, manageable improvements can make all the difference.
Key Takeaways
- Your Home’s Biggest Threat Comes from Tiny Embers: Most homes are lost to wildfires from wind-blown embers, not the main fire front. Your most effective strategy is to address small vulnerabilities by covering vents with fine metal mesh, sealing gaps in your exterior, and clearing flammable debris from your roof and gutters.
- Build Your Defense with Materials and Space: A resilient home relies on both its structure and its surroundings. Pair fire-resistant building materials like Class A roofing and non-combustible siding with a well-maintained “defensible space”—a buffer zone around your home that is clear of flammable vegetation and materials.
- Treat Home Hardening as an Ongoing Strategy: Protecting your property is a continuous process, not a one-time project. Create a routine for inspecting your home’s exterior for wear, performing seasonal clean-up, and planning for future upgrades to ensure your defenses remain effective over time.
What Is Home Hardening and Why Is It Important?
When you think about protecting your property from fire, you might picture a massive wall of flames approaching your neighborhood. But the real threat is often much smaller and sneakier. This is where home hardening comes in. Simply put, home hardening is the process of making a home more resistant to wildfire by using fire-resistant building materials and construction techniques. The main goal is to prevent your home from catching fire in the first place, especially from wind-blown embers that can travel from a fire that’s miles away.
Taking steps to harden your home can be one of the most effective ways to protect your property and everything in it. It involves looking at your house from the outside in—from the roof and siding to the vents and windows—and making smart upgrades that reduce its flammability. Think of it as creating a protective shell around your home. This could mean replacing a wood shake roof with asphalt shingles or metal, or installing fine mesh screens over your vents to keep embers out. By focusing on prevention, you create a stronger, more resilient structure that is better prepared to withstand a wildfire event. This proactive approach not only offers peace of mind but can also be a critical factor in whether your home survives.
What Makes a Home Vulnerable to Wildfires?
Certain features can make a home more susceptible to catching fire. One of the biggest culprits is flammable materials. Things like wood shake roofs, vinyl siding, or even plastic gutters can ignite easily when exposed to heat or embers. Another major weak point is any small gap or opening. Embers are tiny and can get into your home through cracks larger than 1/8 of an inch, especially in vents, under eaves, or around windows. Finally, accumulated debris like dry leaves, pine needles, and twigs in your gutters or on your roof acts as kindling, giving embers the perfect fuel to start a fire.
How Embers Can Ignite a Home
It’s a common belief that a home has to be in the direct path of a wildfire to be at risk, but that’s not usually how it happens. The vast majority of homes lost in wildfires are ignited by burning embers that are carried by the wind. These embers can travel a mile or more ahead of the actual fire front. They land on or near a house and find something easy to ignite, like a pile of dry leaves, a wooden deck, or flammable patio furniture. From there, the fire can quickly spread to the rest of the structure. Understanding this helps shift the focus from the distant fire to the immediate surroundings of your home.
Common Myths About Wildfire Threats
One of the most persistent myths is that the main body of the fire is what destroys most homes. As we’ve covered, the real danger often comes from the ember storm that precedes it. Another misconception is that home hardening is a single, all-or-nothing project. In reality, it’s a series of strategic improvements. You don’t have to do everything at once. Prioritizing upgrades like installing noncombustible siding or creating a defensible, plant-free zone around your home’s foundation can make a significant difference. Every step you take contributes to a more fire-resistant property.
Assess Your Home’s Wildfire Risk
Before you can effectively protect your home, you need to understand its specific vulnerabilities. Assessing your property’s wildfire risk is the foundational first step in any home hardening plan. This isn’t about creating a sense of alarm; it’s about taking a clear-eyed look at your home and the landscape around it so you can make informed, practical decisions. Every property is unique, and what might be a major risk for your neighbor could be less of a concern for you.
Taking the time to conduct a thorough assessment helps you create a prioritized to-do list. You can focus your time, energy, and budget on the upgrades that will make the most significant impact. Let’s walk through a few straightforward ways to get a clear picture of where your home stands and what you can do to improve its resilience against a wildfire.
Use Online Assessment Tools
A great way to get started is with online assessment tools designed to give you a baseline understanding of your risk level. While many resources are state-specific, the principles of home hardening are universal. For example, some state fire departments offer quick online tests that you can complete in less than 10 minutes. After answering a few questions about your property, you may receive a customized report with actionable tips on how to better protect your home. Think of it as a helpful starting point that can guide your efforts and highlight areas you may not have considered.
Follow a Property Evaluation Checklist
Once you have a general idea of your risk, it’s time to take a closer look at your property. Using a detailed property evaluation checklist is an excellent way to conduct a hands-on inspection. Walk around your home and yard, methodically checking off items and taking notes. The main goal here is to spot and address three key areas: flammable materials that could fuel a fire, small openings where embers could enter, and creating clear, defensible spaces around your structures. This process turns a big task into a series of manageable steps, helping you see exactly what needs attention.
Pinpoint Your Home’s Weak Spots
During your evaluation, pay special attention to your home’s potential weak spots. It might surprise you to learn that the biggest threat often isn’t a wall of flames but tiny, wind-blown embers. Research suggests that embers are responsible for the majority of homes lost during wildfires. These glowing embers can travel a mile or more ahead of a fire and find their way into the smallest openings—even a gap as small as 1/8 of an inch is large enough. Look for vulnerabilities like debris buildup in gutters, flammable items stored under a deck, and unsealed vents. Identifying these weak points is critical to strengthening your home’s defenses.
Choose Fire-Resistant Materials for Your Home
When you think about protecting your home from a fire, your mind might go straight to clearing away dry leaves and brush. While that’s definitely important, the actual materials your home is built with play a huge role in its defense. Choosing fire-resistant materials is one of the most effective steps you can take in home hardening. It’s about creating a structure that can stand up to intense heat and resist catching fire from flying embers, which are a primary cause of homes being lost during a wildfire. Let’s walk through the key areas of your home where the right material choices can make all the difference.
Select Ignition-Resistant Roofing
Your roof is one of the most exposed parts of your home, acting like a giant catcher’s mitt for falling embers. To give your home a strong first line of defense, it’s a good idea to use roofing materials with a Class A fire rating. This is the highest rating available, meaning the material is effective against severe fire exposure. Great options include asphalt shingles, metal, slate, and concrete or clay tiles. While upgrading your roof can be a significant investment, selecting an ignition-resistant material could dramatically reduce the chances of your home catching fire from the top down.
Install Fire-Resistant Siding and Walls
Think of your home’s exterior walls as its armor. Using non-combustible or fire-resistant siding is key to preventing flames from getting inside. Materials like fiber cement, stucco, and brick are excellent choices because they simply don’t burn. When installing siding, it’s important to make sure it runs continuously from the foundation to the roof eaves, leaving no gaps where heat or embers could get trapped. If you have wood siding, its resistance can be improved with a fire-retardant treatment, though non-combustible materials generally offer more reliable protection. This creates a solid, protective barrier around your living space.
Upgrade Your Windows and Doors
Windows and doors can be vulnerable spots because intense heat can cause glass to shatter, creating an open invitation for embers and flames. Upgrading to dual-pane windows can make a real difference, as the inner pane stays cooler and is less likely to break. Tempered glass is even stronger and a fantastic option for high-risk areas. You’ll also want to pay attention to the frames—metal or fiberglass frames are more durable than vinyl, which can melt or warp under heat. For doors, a solid-core wood door or a metal door provides a much better fire barrier than a hollow one.
Use Vents That Block Embers
It’s easy to overlook something as small as a vent, but these openings for your attic, foundation, or eaves can be direct highways for wind-blown embers. A single ember that gets into an attic full of flammable insulation can be all it takes to start a devastating fire. A straightforward fix is to cover all vent openings with a fine metal mesh screen of 1/8-inch or smaller. This simple step can block most embers from getting through. For an even higher level of protection, you could install specially designed ember-resistant vents that are engineered to stop embers while still allowing for proper airflow.
Create a Defensible Space Around Your Property
One of the most effective steps you can take to protect your home from wildfire is creating a defensible space. Think of it as a buffer zone between your house and the surrounding landscape. This isn’t about clearing your entire property down to the dirt; it’s about strategically managing the vegetation and materials around your home to reduce potential fuel for a fire. By creating this space, you not only lower the chances of embers igniting your home but also give firefighters a safer area to work if they need to defend your property.
This process involves thinking about your yard in different zones, each with its own set of guidelines. It’s a proactive approach that puts you in control, allowing you to make smart choices about landscaping and maintenance that can significantly improve your home’s odds of survival. Taking the time to establish and maintain a defensible space is a powerful investment in your property’s safety and your own peace of mind. Should you ever face property damage, having these measures in place can be a critical factor, and our team at PA Joe is always here to help you navigate the aftermath.
Manage Vegetation in Zones
A great way to approach your defensible space is by dividing your property into zones based on their distance from your house. The most critical area is the zone immediately surrounding your home, extending about five feet out from your foundation. According to the National Fire Protection Association, this area should be kept free of all flammable materials. This means removing dry leaves, pine needles, mulch, and woodpiles. Instead, consider using non-flammable options like gravel, pavers, or concrete for walkways and landscaping beds right next to the house. This simple change can stop a ground fire from reaching your walls.
Choose Fire-Resistant Landscaping
The plants you choose for your yard can play a huge role in its fire safety. Fire-resistant landscaping doesn’t mean you have to sacrifice a beautiful garden. It’s about selecting plants that are less likely to ignite and spread flames. These plants typically have a high moisture content and a low amount of flammable sap or resin. You can find lists of fire-wise plants suitable for Florida through resources like your local cooperative extension office. When planting, it’s also important to think about spacing. Avoid planting dense rows of shrubs or trees that could create a continuous path for fire to travel across your property.
Maintain Clear, Ember-Resistant Areas
Creating a defensible space is an ongoing project, not a one-time fix. Regular maintenance is key to keeping your property safe from embers, which can travel long distances and ignite small pockets of fuel. Make it a habit to clear leaves and other debris from your roof and gutters. Prune tree branches so they are at least ten feet away from your chimney and roof. In the zone extending from five to 30 feet from your home, focus on keeping the area tidy. This means raking up dead leaves, removing dead trees or shrubs, and thinning out dense vegetation to break up the continuity of fuel. Consistent upkeep ensures your defensible space remains effective year after year.
What Are the Financial Benefits of Home Hardening?
Protecting your home from potential damage is the main reason to invest in home hardening, but the benefits don’t stop there. Making your property more resilient is also a smart financial decision that can pay off in several ways. Think of it as an investment not just in your home’s structure, but in your financial stability. From immediate savings on your insurance bills to a higher resale value down the road, the financial upsides are significant.
When you take proactive steps to reduce your home’s vulnerability, you’re not just buying peace of mind—you’re making a calculated move that insurance companies and future buyers will recognize. These upgrades can lower your recurring costs as a homeowner and reduce the chances of facing major, out-of-pocket expenses after a disaster. If you’ve ever had to deal with a property damage claim, you know how disruptive and costly it can be. Home hardening helps you get ahead of the problem, strengthening both your house and your finances.
Lower Your Insurance Premiums
One of the most immediate financial perks of home hardening is the potential for lower insurance premiums. Insurance companies assess risk when setting their rates, and a well-protected home is simply less risky to insure. By installing fire-resistant roofing, ember-proof vents, or other protective features, you demonstrate that you’re actively reducing the likelihood of a major claim.
Insurers often reward these efforts with significant discounts. Some homeowners have reported savings of up to 24% on their annual property insurance after making these upgrades. In high-risk areas, these discounts can make a huge difference in your yearly budget, turning a necessary safety measure into a cost-saving strategy.
Reduce Long-Term Claim Risks
Beyond saving on premiums, home hardening helps you avoid the financial and emotional toll of filing a claim in the first place. Every upgrade you make lowers the odds that you’ll have to deal with damage from a fire, hurricane, or other event. This is a major benefit because it helps you maintain control over your insurance costs over the long term. A clean claims history can prevent your rates from increasing in the future.
Ultimately, the goal is to prevent damage before it happens. As experts on home hardening tips point out, reducing your likelihood of filing a claim is a win for you. You sidestep the stress, the deductibles, and the potential for uncovered expenses that often come with property damage.
Increase Your Property Value
Home hardening is an investment that can increase what your property is worth. In today’s market, especially in areas prone to extreme weather, a resilient and disaster-ready home is a huge selling point. Potential buyers are increasingly looking for homes that offer security and lower long-term maintenance and insurance costs. Features like impact-resistant windows or a fire-resistant roof can make your property stand out.
Studies have shown that these upgrades bring major economic benefits, including increased property values. When you decide to sell, you can market your home’s hardened features as a premium benefit, justifying a higher asking price and attracting savvy buyers who understand the value of a well-protected investment.
Find Financial Incentives for Home Hardening
Making your home more resilient to storms is a smart move, but the cost can feel daunting. The good news is you may not have to cover the entire expense yourself. A variety of financial incentives are often available to help homeowners invest in property protection. These programs encourage proactive measures that can reduce the risk of significant damage. From federal grants and state-level rebates to local assistance and insurance discounts, there are several avenues to explore that can make home hardening more affordable and protect your biggest investment.
Look for Federal and State Rebates
Government programs at both the federal and state levels can offer significant financial help for home hardening projects. For instance, Florida’s My Safe Florida Home program provides grants to eligible homeowners for upgrades like strengthening roofs and installing impact-resistant windows and doors. These initiatives are designed to help residents make their homes safer against hurricanes. It’s always a good idea to check for current state-sponsored programs, as they can provide matching grants or rebates that cover a substantial portion of your project costs.
Check for Local and Utility Assistance
Don’t forget to look for help closer to home. Your local city or county government, and sometimes even your utility company, may offer assistance programs for home hardening. These programs can come in the form of direct rebates, low-interest loans, or free property assessments to identify key vulnerabilities. You can typically find information by visiting your municipality’s website or contacting your local emergency management office. These community-based incentives are a great way to get support tailored to your area’s specific risks.
Explore Tax Credits and Financing
Beyond grants and rebates, you may find savings through tax credits and insurance discounts. Some home hardening improvements could qualify for tax credits, so it’s worth discussing with a tax professional. Additionally, many insurance companies offer premium reductions for homes that meet certain resilience standards. Programs like FORTIFIED Home provide a framework for strengthening your property against high winds, and achieving this certification can lead to lower insurance costs. Be sure to talk to your insurance agent about potential discounts before you begin your project to see what upgrades offer the best return.
Avoid These Home Hardening Mistakes
Taking steps to harden your home is a fantastic move toward protecting your property. But like any home improvement project, there are pitfalls that can undermine your efforts and give you a false sense of security. Making sure your investment of time and money truly counts means being aware of a few common mistakes. By avoiding these errors, you can create a more effective defense for your home and family. Let’s walk through what to watch out for, from selecting the right materials to keeping up with maintenance long after the initial project is done.
Choosing or Installing Materials Incorrectly
It’s easy to assume that any product labeled “fire-resistant” will do the job, but the details really matter. Home hardening isn’t a one-size-fits-all solution; the right choices depend on your home’s specific vulnerabilities. For example, using fire-resistant roofing like metal, tile, or Class A shingles is a great start, but only if it’s installed correctly. Improper installation can leave gaps where embers can sneak in and ignite your home from the inside out. When you’re ready to choose your materials, it’s important to research their fire-resistance ratings and follow manufacturer guidelines to the letter or hire a professional who understands the specific requirements for wildfire-prone areas.
Using an Incomplete Protection Strategy
Many people focus on big-ticket items like siding or roofing and overlook the small details where a fire is most likely to start. Research shows that most homes are lost to wildfire not from the main wall of flames, but from tiny, wind-blown embers that can travel a mile or more. These embers can get into your home through unprotected vents, accumulate under your deck, or ignite debris in your gutters. A complete strategy involves looking at your home as a whole system. This means pairing ember-resistant vents with fire-resistant siding and maintaining a clean defensible space around your property. Every element works together to reduce your overall risk.
Forgetting About Regular Maintenance
Home hardening is not a one-and-done project; it requires ongoing attention to remain effective. Over time, materials can wear down, creating new vulnerabilities. A small crack in your stucco, a warped board on your deck, or a screen that has pulled away from a vent can become an entry point for embers. That’s why creating a regular maintenance schedule is so important. At least twice a year, walk around your property to inspect your home’s exterior. Clear leaves and pine needles from your roof and gutters, check for and seal any gaps or cracks, and make sure your defensible space is clear of flammable debris. Consistent upkeep ensures your home’s defenses are always ready.
Maintain Your Hardened Home
Think of home hardening as an ongoing commitment rather than a one-time project. Just like any other part of your property, the features that protect your home from wildfires need regular attention to stay effective. Creating a simple maintenance plan helps ensure your initial investment continues to pay off, keeping your home, and everyone in it, safer. A little bit of upkeep can make a huge difference in how well your home withstands a potential threat. By staying proactive, you can identify and address vulnerabilities before they become serious risks. This consistent effort is key to maintaining a truly resilient property year after year.
Follow a Regular Inspection Schedule
Setting up a regular inspection routine is one of the most effective things you can do. You don’t need to be a professional inspector; a simple walk-around every few months can help you spot potential issues. Create a checklist of areas to examine, including your roof, gutters, vents, siding, windows, and the immediate space around your home. Look for things like cracked siding, damaged roof tiles, or debris buildup. As CAL FIRE notes, “Regular maintenance and upgrades to older homes can significantly improve their chance of survival during a wildfire.” Scheduling these checks, perhaps once a season, helps you stay on top of small repairs before they turn into major vulnerabilities during an emergency.
Prepare for Each Season and Remove Debris
Each season brings different maintenance needs, especially in Florida. A critical task is to consistently remove flammable debris from your property. Embers can travel long distances and easily ignite dry leaves, pine needles, or twigs. Make it a habit to clear your roof and gutters of any buildup, as this is a prime spot for embers to land and catch fire. Pay close attention to the area directly against your home, sweeping away any accumulated plant matter from foundation walls and under decks. This simple act of cleaning removes the fuel that a stray ember would need to ignite your home, significantly reducing your risk.
Keep Up with Fire-Resistant Features
The fire-resistant materials you’ve installed are your home’s armor, but even armor needs upkeep. Regularly inspect your siding and roofing for any signs of wear, damage, or gaps where embers could get trapped. If you have older, more flammable features like wood shingles, you might consider a plan for future upgrades to materials like metal, tile, or asphalt. Check that your ember-resistant vents are clean and unobstructed so they can function properly. Maintaining these features ensures they perform as intended when you need them most, providing a strong and reliable defense against wildfire threats.
Start Your Home Hardening Project
Taking the first step toward protecting your home can feel like a big undertaking, but breaking it down into manageable pieces makes it much more approachable. By focusing on a clear plan, you can systematically improve your property’s resilience against fire damage. It starts with understanding your specific risks, finding the right people for the job, and creating a realistic budget. This structured approach helps ensure your efforts are both effective and efficient.
Prioritize Upgrades Based on Your Risk
Not all homes face the same level of risk, and not all upgrades offer the same degree of protection. The key is to start with the most vulnerable areas of your property. According to fire safety experts, many homes have common weak spots, including small gaps, vents, flammable materials near the structure, and debris buildup in gutters or under decks. A thorough home hardening plan involves using fire-resistant building materials and adopting safer landscaping practices. By identifying and addressing your home’s most critical vulnerabilities first, you can make the biggest impact on its safety right away.
Hire Contractors and Get Permits
Once you know what needs to be done, it’s time to bring in professionals. Working with qualified contractors who have experience with fire-resistant materials is essential for a successful project. They can ensure that materials are installed correctly and meet safety standards. Before you begin any work, it’s also a good idea to check with your local building department. Some upgrades, especially those involving structural changes or vents, may require permits to ensure they comply with local codes and don’t unintentionally affect your home’s airflow or integrity. Following the proper channels helps you prepare for wildfire season safely and effectively.
Plan Your Timeline and Budget
Home hardening is an investment in your property’s future, and like any project, it requires a solid financial plan. The costs can vary widely depending on the extent of the upgrades you choose to make. For example, research on California’s home hardening economy shows that costs can range from a few thousand dollars for basic improvements to much more for comprehensive retrofits. Create a budget that outlines your expected expenses and build a timeline for completing the work. It’s also worth looking into potential financial assistance, as some areas offer rebates or incentives for homeowners who complete certain fire-safe upgrades.
Related Articles
- Top 8 Reasons for Fire Insurance Claim Denial
- The House Fire Insurance Claim Process Explained – Public Adjuster
- Electrical Fire Insurance Claim: A Simple Guide – Public Adjuster
Frequently Asked Questions
I’m on a tight budget. What’s the most important thing I can do first? If you’re looking for the most impactful place to start, focus on the five feet immediately surrounding your home’s foundation. This is often called the “ember-ignition zone.” Clearing this area of all flammable materials—like mulch, dry leaves, and dead plants—can make a huge difference. You can also install fine metal mesh screens over your vents. These are relatively low-cost projects that directly address the biggest threat, which is wind-blown embers finding fuel right next to your house.
Is home hardening the same as creating a defensible space? That’s a great question, as the two terms are often used together. Think of it this way: home hardening refers to the structure of your house itself—using fire-resistant materials for your roof, siding, windows, and vents. Creating a defensible space is about managing the landscape and vegetation in the yard around your house to reduce fuel for a fire. A truly resilient property needs both a strong structure and a well-maintained yard.
Do I really need to worry about this if my house isn’t right next to a wooded area? It’s a common misconception that you’re only at risk if you’re directly in a fire’s path. The reality is that the vast majority of homes lost in wildfires are ignited by embers that can be carried by the wind for a mile or more. These tiny embers can land on your roof, in your gutters, or on flammable items in your yard and start a fire, even if the main blaze is far away.
Will making my home fire-resistant mean I have to sacrifice its appearance? Not at all. Many modern, fire-resistant building materials are designed to look just like their traditional counterparts. You can find fiber-cement siding that mimics the look of wood, beautiful asphalt shingles that have a Class A fire rating, and stylish dual-pane windows. The goal is to make smart, durable choices, and you’ll find there are plenty of options available that can match your home’s aesthetic.
Is this a one-time project, or is there ongoing work involved? Home hardening is best viewed as an ongoing commitment to your property’s safety. While major upgrades like a new roof are long-term investments, regular maintenance is what keeps your defenses strong. This means consistently clearing debris from your roof and gutters, inspecting your siding and vents for any damage, and keeping your defensible space clean and tidy. A little bit of seasonal upkeep ensures your home remains prepared.